Wednesday, August 22, 2012

I have Moved

Hi, I just wanted to share I have a NEW BLOG that can be found HERE I may be on this blog periodically just to check out messages and stuff but most of my blogging will be done over at Snap.Craft.Sew So please go check it out and become a member on the NEW BLOG as well. Thanks for stopping by.

                                                                       ENJOY!


Friday, March 9, 2012

Felt Barrettes

These Felt Barrettes I made awhile ago as a gift for Katie.
I made so many hair accessories for her and her sister 
that I still couldn't get myself to even think of make anymore for 
a long time!


You can find more I made for them here , here and here.


I made some bow holders here for them as well.


ENJOY!

Wednesday, March 7, 2012

Vinyl and Damask Wood Blocks

Vinyl and Damask Wood Blocks.


Last year I started a little wood working...something I have enjoyed since
 my first wood shop class in High School. This is a simple wood 
project using scrapbook paper, vinyl lettering cut from my electric 
cutter, a little paint and decoupage. I knew I wanted to make something
 with theses elements and found the idea looking around on the net. 


I made this as a gift, but struggled with giving this one away...I just 
loved the way it turned out! (8


While taking my photos I have been experimenting with lighting.
 My pictures are always turning out yellow ugh! Then, I did
 some research on lighting and decided to make a light box. I added
 some lights and different backgrounds to see what I could come up
with...hmm much better than all the yellow pictures I had been taking.
 They still need some work but I think they are getting a little better.

I turned the fabric over to the back side...it gave it a vintage look.


Here is some of the yellowing IN the box...UGH!


These were really fun and a quick unique gift to make...I think I am going 
to go make more!

ENJOY!

Wednesday, February 29, 2012

Football Card

Football Card.


Here is a Masculine birthday card for the football crazed!


I loved how it turned out with all the right texture and what a great use
 for all those grommets in your stash...I added a simple happy 
birthday oval and added some dashes with my new
 favorite white pen, ( I love this pen!), and thats it, another birthday card 
for the hubbster done!


ENJOY!

Monday, February 27, 2012

Casserole Carrier

I made these casserole carriers for family members at christmas 
time. I made three, that was all I had time to make. If you look closely
 the bottom two were made with a double sided quilted fabric. I DON'T 
recommend using this type of fabric for this project as it made it harder 
to sew. At $20./yd just think of all the cute fabrics I 
COULD HAVE bought. 


However, if you are a more experienced sewer or have worked with this 
type of fabric before you might know a few little tricks to make it a more 
pleasant sewing experience.


I bought this apple fabric awhile back thinking I might make the girls a 
skirt or maybe aprons for their play kitchen, but when I went to make these 
gifts I remembered their moms kitchen was done in a apple theme and 
thought "how perfect!"


This is the tricky fabric I was telling you about...


...I bought it because I was looking for something a little less bright 
with pretty colors. The fabric had the quilting already in it, so it 
might save some time right?  NO, it actually created other problems. 
Not to mention, I had to get creative making sure I had enough fabric to 
finish the project. Since, I was getting frustrated I went ahead to make an
 oven mitt, not a good idea if you are not sure you have enough fabric 
to make your original project. In the end I was pretty happy with how 
they turned out and REALLY proud I hung in there to finish and send 
them off. I was happy to know hear they were well received...
...WHEW lesson learned...keep it simple!


Another variation of the one above with a oven mitt included.


I etched the last name of the receiver on the side of the dish but forgot
 to take a picture of it...sorry, but if you go here and here you can get the idea 
and a tutorial of how I made these.
ENJOY!

Saturday, February 25, 2012

Pink Skull T-shirt


 Pink Skull T-shirt...my first T-shirt Vinyl project!


Just had to share my first T-shirt vinyl project. It's supper easy...First, buy some T-shirt vinyl, (you can buy it here). Then, cut it out with your electric cutter or by hand using a stencil first. 


Next, iron it on it's that simple! If you want to, add some embellishments...I added some BLING.

ENJOY!

Friday, February 24, 2012

Hop Scotch Mat

Hop Scotch Mat (the copycat version)...I found a picture of a hopscotch 
mat like this one online somewhere and saved the picture because 
I knew I wanted  to make one for Katelynn as a gift. My husband picked up
 a drop cloth for around $8. at Lowe's for me and I had plenty of felt on hand.  


This project was pretty much about deciding how long and wide I wanted my
 mat and how large I wanted my squares and numbers, of course I forgot to take 
picture of the steps to make this project, but I will do my best to 
explain it...really it was very simple. 


First, I laid out my drop cloth on the floor. Then, I laid out 10-12x12 scrapbook
 sheets of paper on the drop cloth in a hopscotch pattern and traced around
 them leaving about a 4 inch border all the way around the mat, this would also
 be a good time to cut your drop cloth so it is easier to work with,(remember to 
cut a seam allowance for turning and sewing up the sides 1/4").  Next, I cut 
several long strips of felt with a rotary cutter and ruler for the chalk outline and 
I sewed them onto my traced outline on the mat. Then, on my computer I went into
 my fonts printed and cut out the numbers 0-9 in the font of my choice. 
Next, I traced the numbers onto my felt and cut out all the numbers,
 (be sure to trace and cutout the number 1 twice so that you now have the numbers 1-10). 
Then, I sewed my numbers on the mat in the center of the squares. Next, I made three 
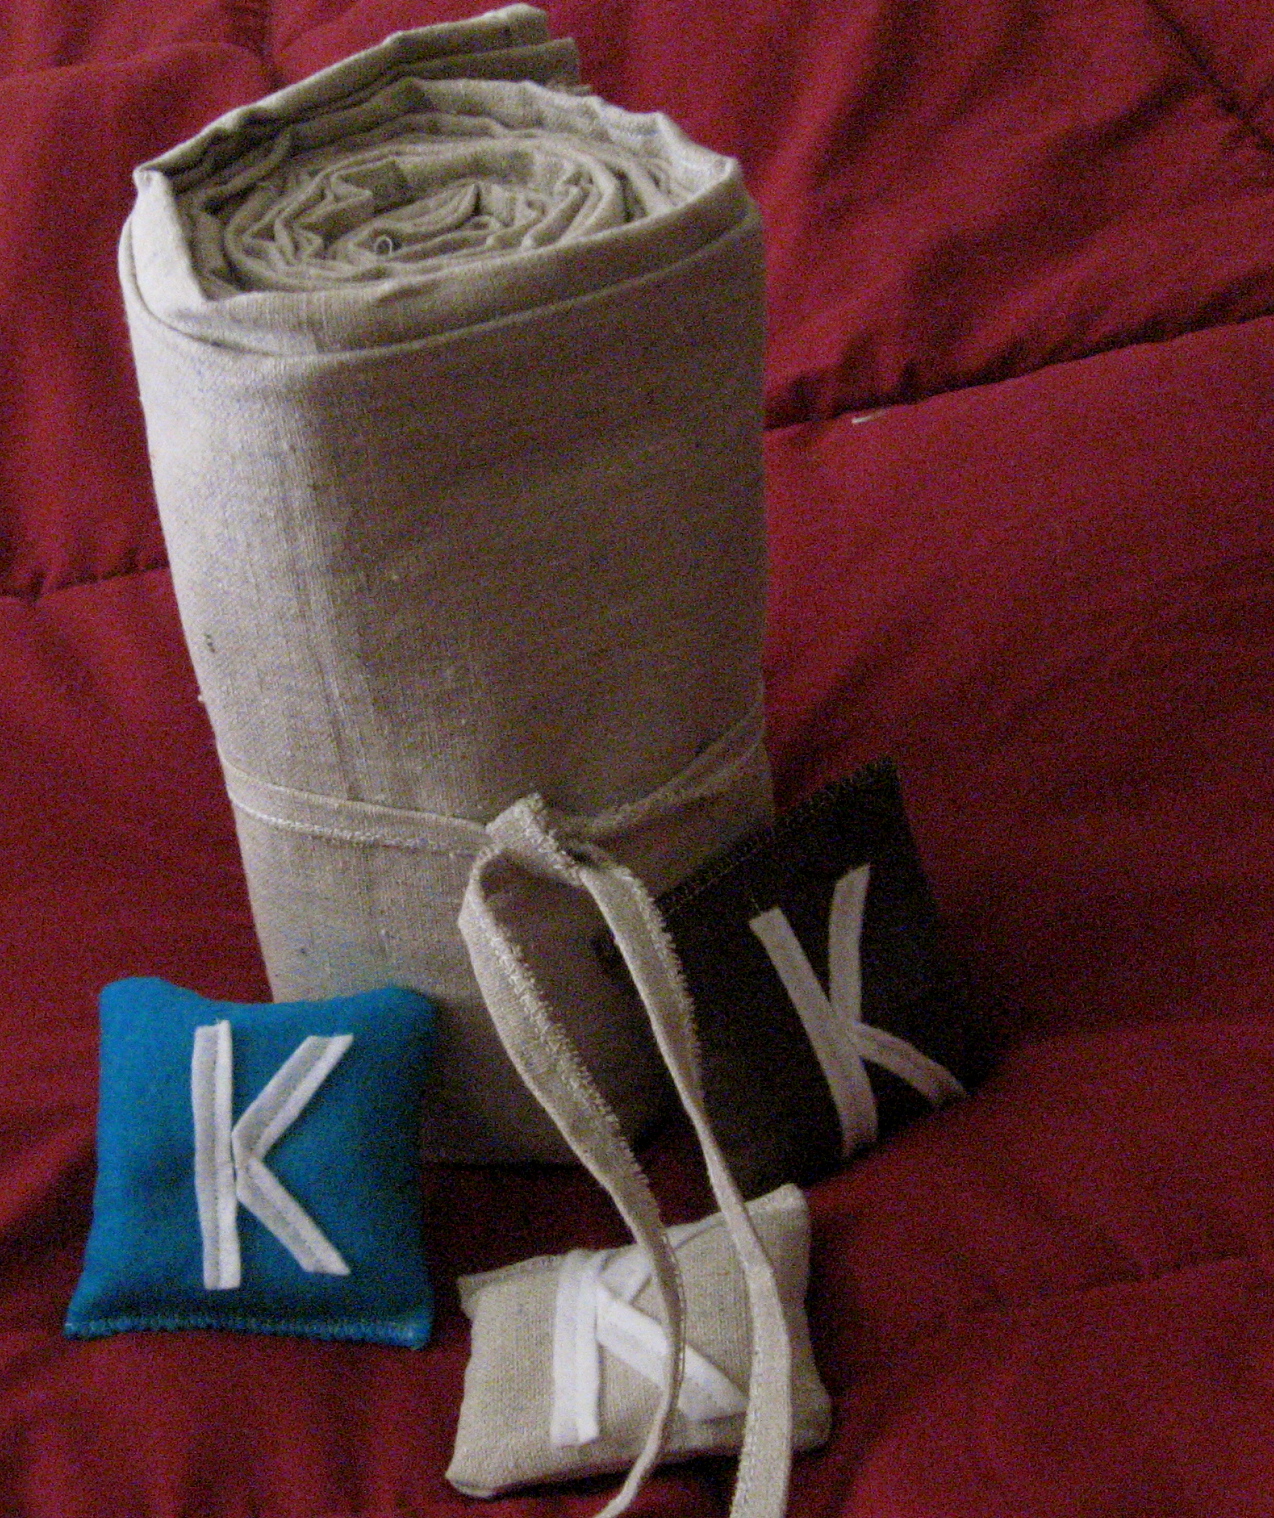
felt bean bags with Katie's Initial in three different colors so her sister and friends 
can play Hop Scotch with her. Finally, I sewed on two long ties onto one end 
of the mat, so that the mat could be rolled up and tied for storage, and there you have it 
a special gift for a special little girl OR boy.


Here it is all rolled up and tied. originally I was going to make a easy draw 
string bag for the mat and bean bags to be stored in, but then changed my mind. 
I think the drawstring bag would make a cute gift bag as well as a storage bag.
 You can find an easy drawstring bag tutorial here.


ENJOY!